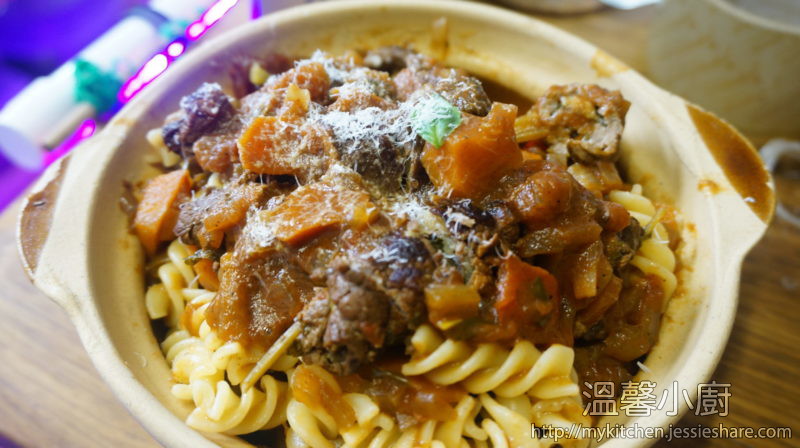
這道菜對於喜歡吃蒜香味及蕃茜的朋友來說是一大享受,雖然煮法比較繁複,但卻是味蕾的享受,值得一試的。
This dish is suitable for those people who really love garlic and parsley, although it’s quite complicated to cook, but the flavour is really amazing, it’s worth to try.
This pasta dish is the most favourite dish for me and my beloved one, it’s so delicious, sometimes we can’t finished it, then we will leave it to make Italian meatball sandwiches too. Although it’s quite a lot ingredients and cooking method , but it’s worth to try.
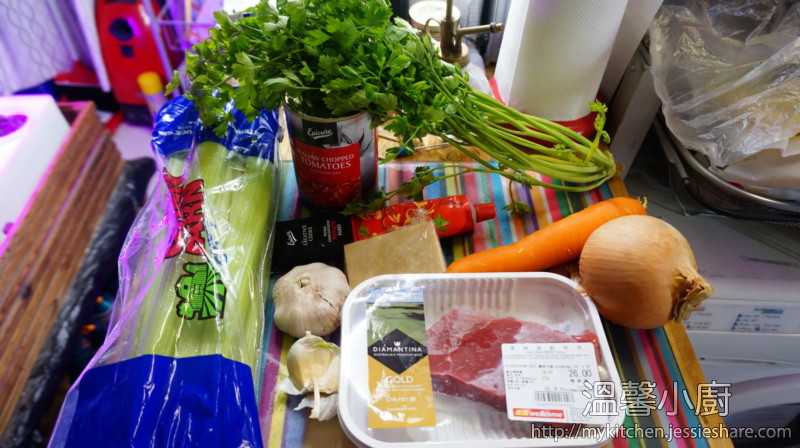
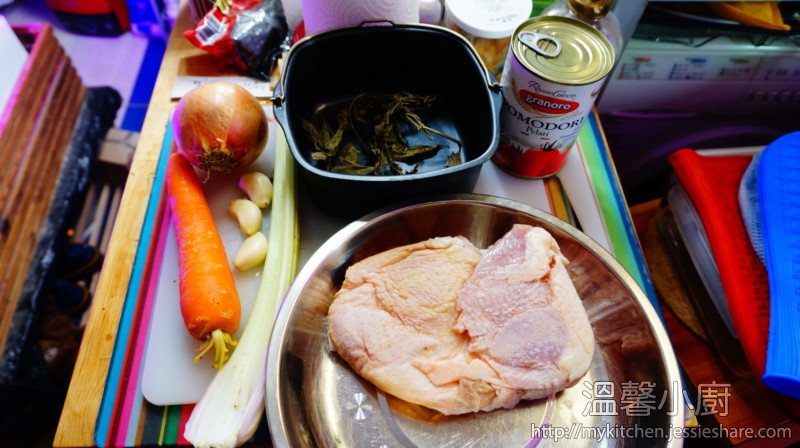
材料 (Ingredients) :
肉丸材料 (Meat ball) :
雞肉 {雞胸或去骨雞脾肉} (Chicken meat – breast or boneless chicken leg) – 1/2 磅 (1/2 pound)
蒜頭 (Garlic) – 2瓣 (2 cloves)
辣椒 (Chilli) – 1隻 (1 pc)
意式麵包糠 (Bread crumbs) – 50g
番茜 (Parsley) – 適量 (few)
巴馬臣芝士 (Parmesan Cheese) – 適量 (few)
黑胡椒 (Black Pepper) – 少許 (few)
蛋 (Egg) – 1隻 (1 pc)
鹽 (Salt) – 少許 (few)
醬料材料 (Sauce) :
洋蔥 (Onion) – 半個 (1/2 pc)
紅蘿蔔 (Carrots) – 1條 (1 pc)
西芹 (Celery) – 1條 (1 stick)
意大利番茄碎 (Chopped Tomatos Can) [ 如果讀者已有意大利番茄醬也可以直接用 (You can use Passata sauce instead) – 1 罐 (1 Can)
鹽 (Salt) – 少許 (few)
甜蘿勒葉 (Basil) – 大量 (Handful)
巴馬臣芝士 (Parmesan Cheese) – 適量 (Handful)
做法 (Method) :
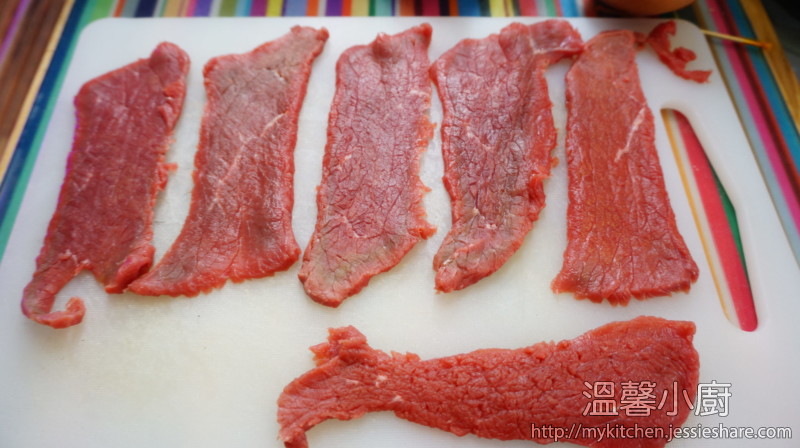
1. 把雞肉用攪肉機做成肉碎 (由於作者最近的超市沒有已攪好的肉碎,所以要自己動手)
Use meat grinder to make ground meat (If you can buy ground chicken meat, please skip this step)
2. 蒜頭、辣椒、番茜切碎,芝士刨碎,並加入肉碎內
Chopped garlic, chilli and parsley, grated some cheese and add into the ground meat
3. 再加入鹽、黑胡椒、蛋及麵包碎,用手搓勻所有材料
Put some salt, black pepper, egg and bread crumbs into the ground meat, then mix it well by hand
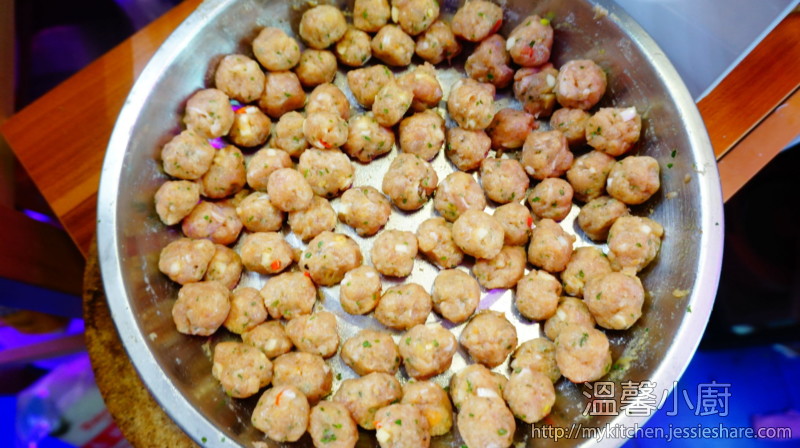
4. 用手搓出一個個小肉丸子,不要太大,一隻指頭大小就好了
Use your hand and make it a little meat ball one by one, not too large, just a finger tips size
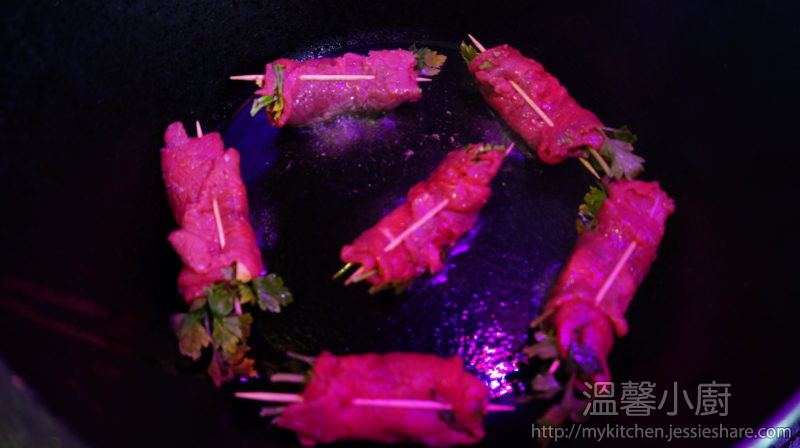
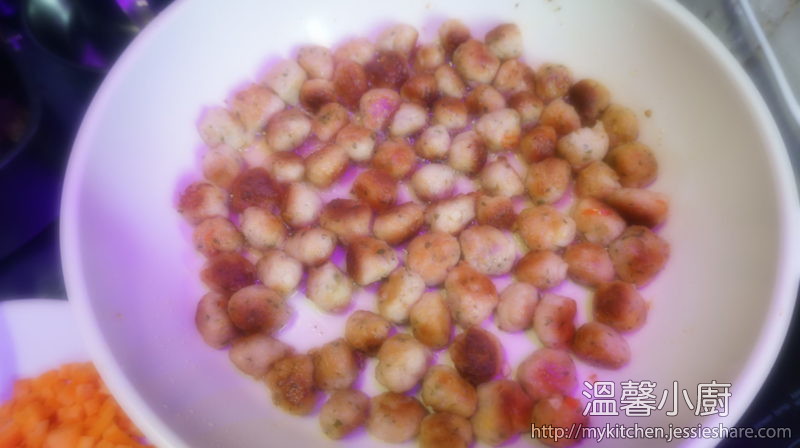
5. 準備一個平底鍋,加入3-4湯匙橄欖油,加入肉丸,用慢火煎至金黃,不時搖晃,令肉丸均勻地煎
Prepare a sauce pan, add some olive oil, fry the meat balls in small heat until golden brown, shake it sometimes
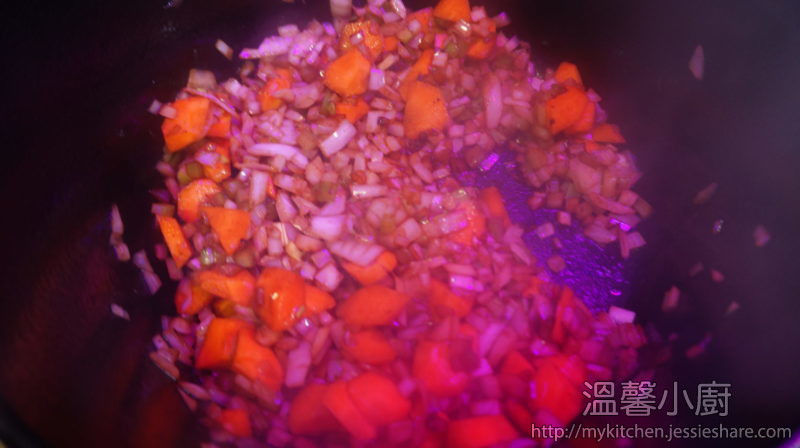
6. 把洋蔥、紅蘿蔔及西芹切碎
Chopped onion, carrots and celery
7. 準備另一個鍋,加入少許橄欖油,把洋蔥、紅蘿蔔及西芹煮至軟身
Prepare another saucepan, add some oil, stir fried onion, carrots and celery until soft
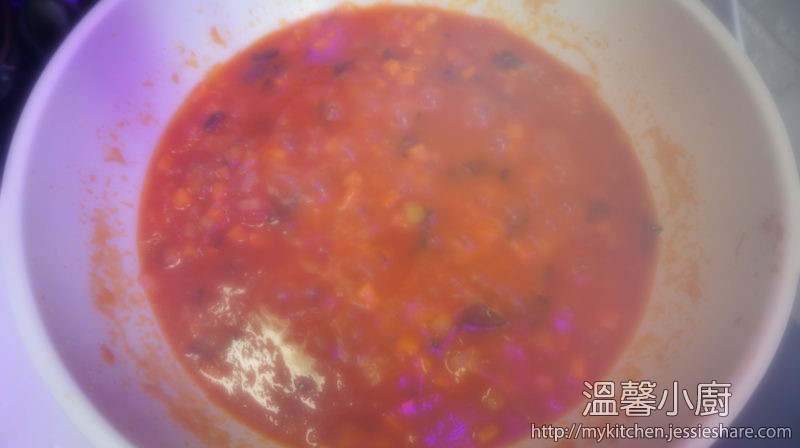
8. 再加入番茄碎或意大利番茄醬 (如果用罐頭番茄碎就得加入蘿勒葉了)
Add chopped tomatos or passata sauce (if you are using chopped tomatos, please add basil afterwards)
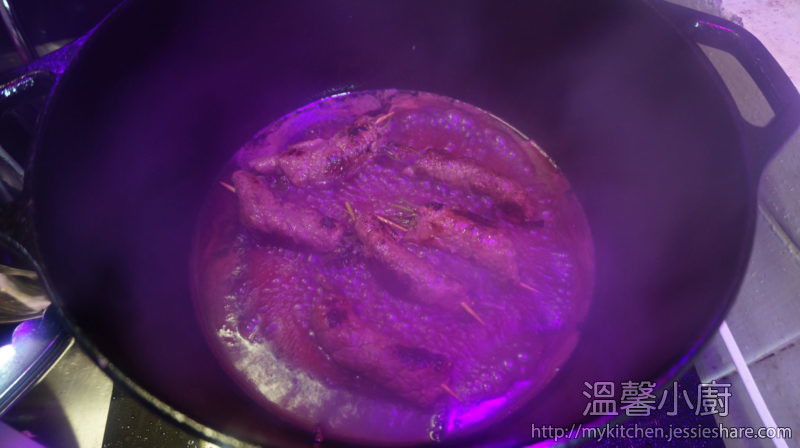
9. 加上少許水,然後加鹽調味
Add some pasta water if necessary, and add some salt for seasoning
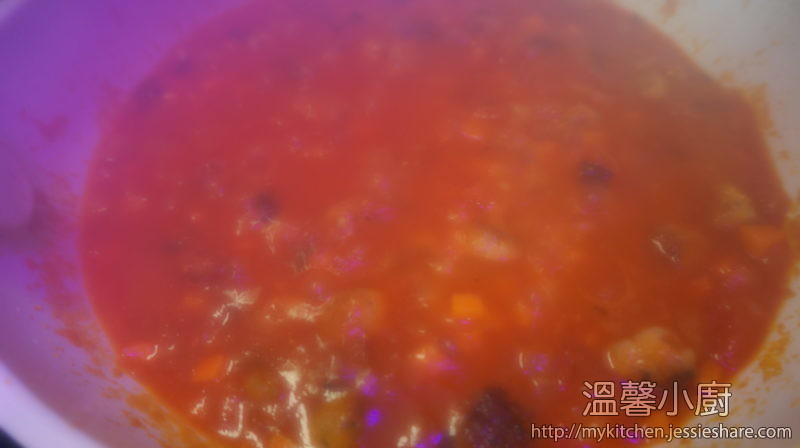
10. 把煎好的肉丸加入醬汁內再煮一會
Put the meat balls into the sauce and cook for a while
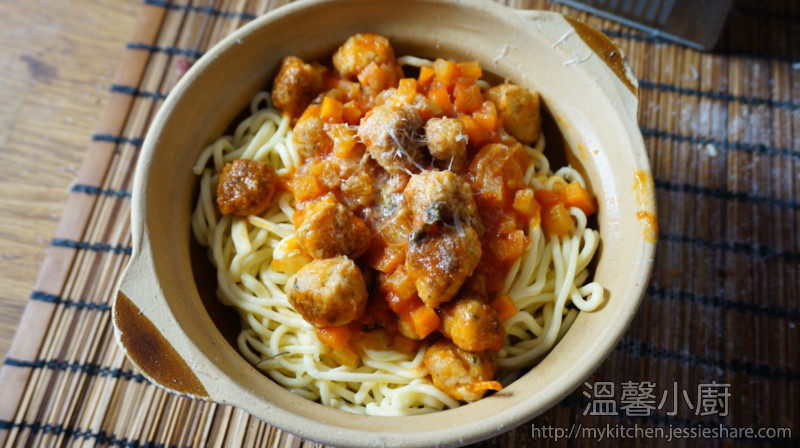
11. 加入煮好的意粉伴勻
Add cooked pasta and mix it well
12. 最後加上芝士碎就完成
Add some grated cheese and finished.
在香港,小編估計比較少人聽過或食過,因為很少食店會供應,而超市也沒有這食品,但在外國卻很常見,甚至是街頭小食也有。
I think there are very few people heard or even tried duck breast proscuitto in Hong Kong, also very few restaurant will provide this food, and can’t find it provided in supermarket as well, however, this food is so common in foreign counties and you can find it in food truck too.
風乾鴨胸火腿是風乾肉類中最容易及最快可以食用的,醃製需時1-2天,而風乾只需2-3星期就可以了。
Duck breast proscuitto is the most easy and the most shorten time to do compared to other type of proscuitto, it only takes 1-2 days for curing and air-dried around 2-3 weeks.
做法 :
1. 洗淨鴨胸及印乾
Wash it well and dry it using paper towel
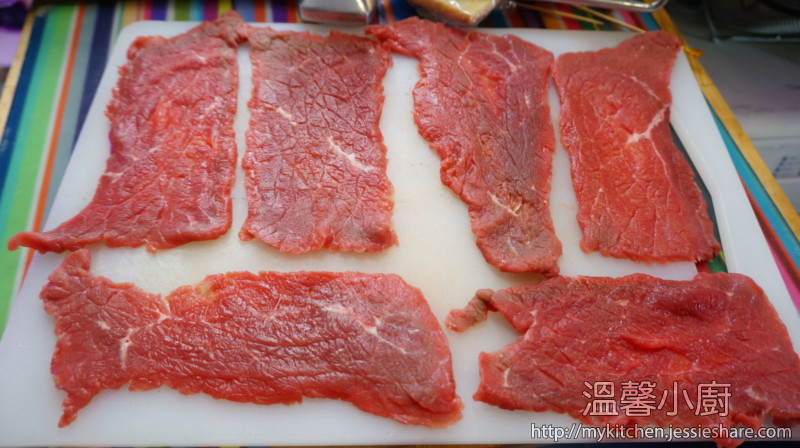
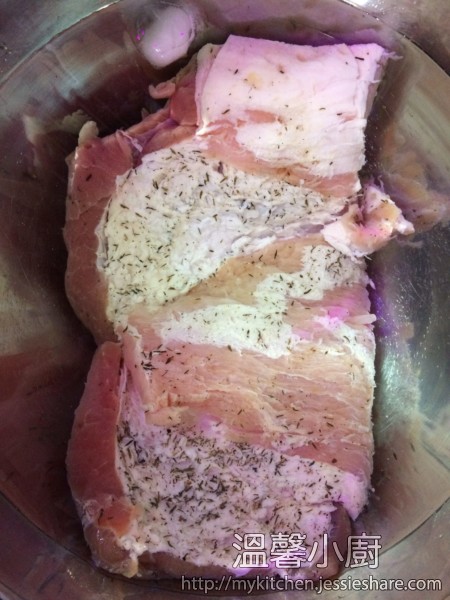
2. 在枱上鋪好一張保鮮紙,先將鹽及黑胡椒灑在保鮮紙上,放上鴨胸,再在鴨胸上灑滿鹽及黑胡椒至整件鴨胸給鹽及黑胡椒包住
Place a plastic wrap in the table, put some salt and black pepper in the plastic wrap and place the duck breast in, and put more salt and black pepper to cover the whole duck breast
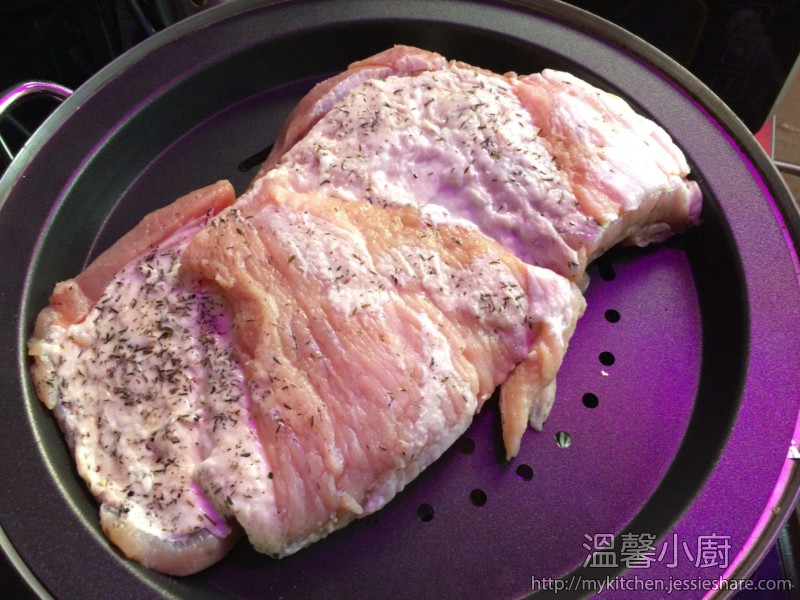
3. 小心地用保鮮紙包實所有東西,就可以放入雪櫃醃製
Carefully wrap well the plastic warp all over the duck breast and put into the refrigerator
4. 1-2天後把醃好的鴨胸取出,在水清洗後,印乾,就可以進行風乾
Take it out from refrigerator after 1-2 days and wash it under water tape, dry it using paper towel and hang it out for air drying
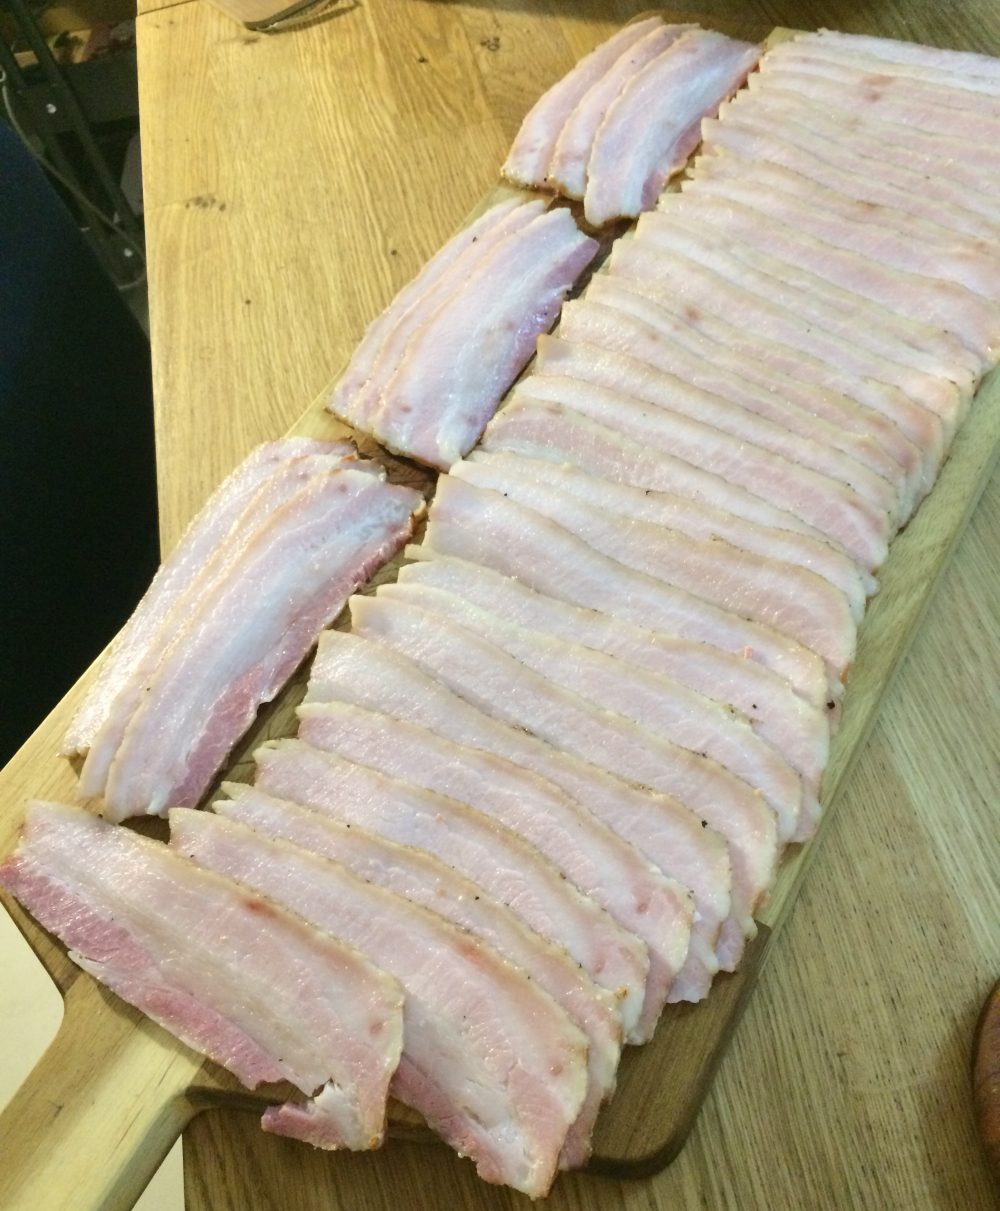
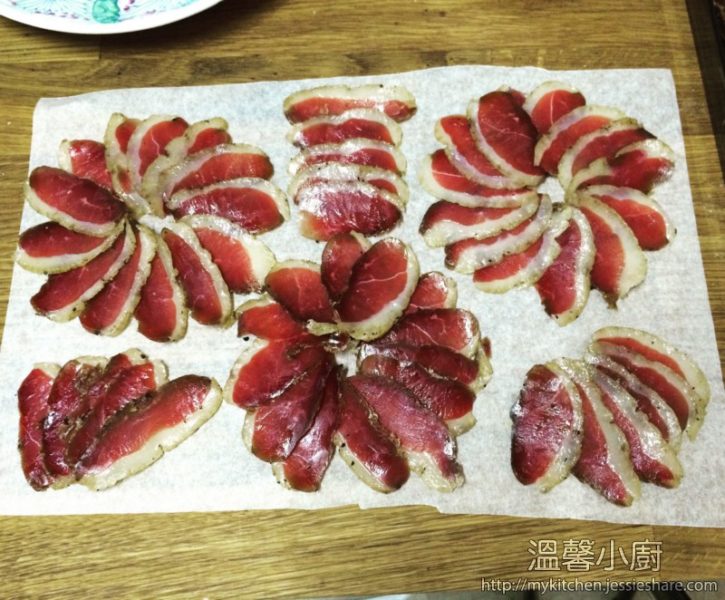
5. 大約2星期就可以切成薄片,用來做送酒佐口小食係一個不錯的配合
After dried for 2 weeks, you can cut it into think slice and good to eat with wine.
Tips : 如果讀者怕鴨肉的羶味,可以配藍芝士一起食用,藍芝士不僅帶走鴨羶味,還給你口腔爆發不同的味道。
 If you don't really like the duck taste, you can try to eat with blue cheese, it can give you a complex taste within your mouth.

[wpedon id="1981" align="left"]
In this post, I also wanna talk a bit about WHO’s just announced that processed meats caused cancer, however, don’t panic about this, WHO’s actually meant processed meats made in factory, as I mentioned in earlier post, factories make processed meats with sodium nitrites, nitrates and artificial flavouring, since when the cured meat occured, the meats will absorb and transform those chemicals with its protein and this is what caused cancer afterwards. On the other hand, our homemade processed meats without these chemicals, once you are careful while process the meat in temperature, humidity, hygiene and acidity, you should safety to enjoy it. Since we are just using salt and sugar to help the meat to get rid of water to prevent growth of bacteria and herbs just add natural flavouring for meats. For the smoking meats, generally will use grill stove or outdoor smoker and process smoking with coal and wood to get the flavour, but barbecue with coal, it will be caused the risk of cancer itself no matter added wood or not. Actually, the stove-top smoker that I’m used that without process with coal, just heat up the wood and get its smell, and, the cooking temperature is low compared with general direct cooking, so it’s safety as well.
The most popular curing pork are bacon and sausages. Of course, you can make ham as well, but I can’t find boneless pork leg, on the other hand, you have to buy beef casing in order to make ham.
Well, we talk about bacon and pancetta (Italian bacon), both are using pork belly, it’s easy to find in supermarkets or butchers, and they are the most easiest way to enter homemade curing world. Bacon and pancetta curing method are the same, but after curing, bacon have to be smoked and pancetta have to be air-dried for a month.
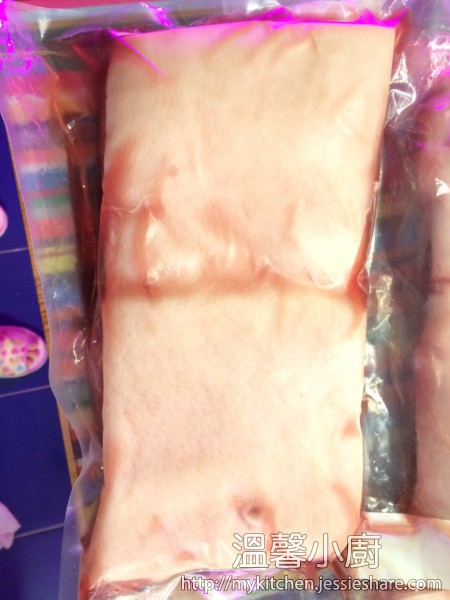
First you need a large pork belly in square or rectangle shape, but if you wanna just try first, you can also buy a small one, but the curing time are the same.
煙肉的做法 (Bacon) :
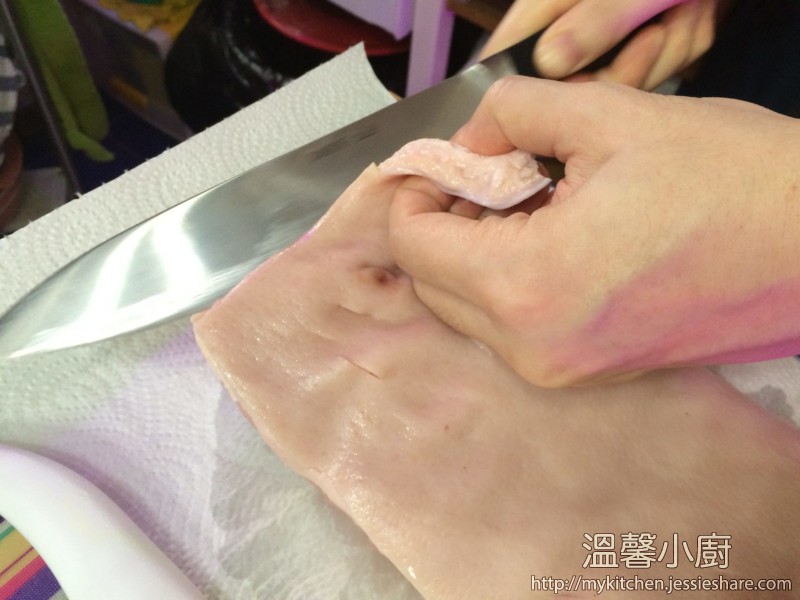
1. 先清洗一下,用紙印乾,然後把豬皮慢慢地用刀分開,豬皮可以留作其他用途的,不要棄掉;
Wash it and dry it using paper towel or cloth, cut out the lard using sharp knife carefully, keep the lard for other usage
2. 用小刀小心地去除腩肉底部的膜 (如有)
Cut out the sheet underneath of the belly of the pork (if necessary)
3. 先量度腩肉的重量,而鹽的分量是腩肉的2.5%
Measure the weight of the pork belly and prepare the salt around 2.5% of meat weight
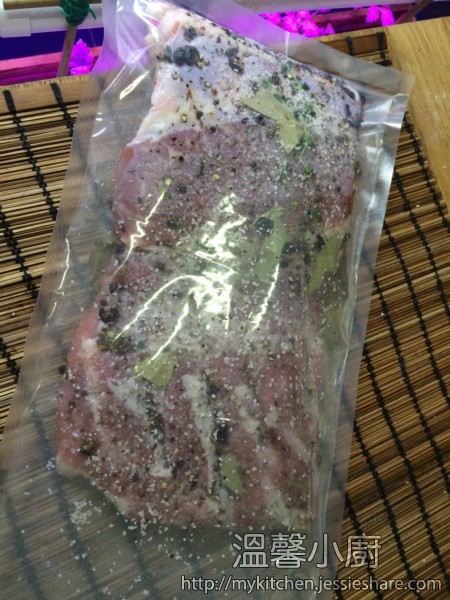
4. 準備一個密封的袋或可用真空機幫助,把腩肉放入,然後加入鹽、黑胡椒、蔗糖、月桂葉、蜜糖或楓糖 (用於煙肉),以及乾杜松果(可以不加,視乎個人喜好),把醃料平均地塗滿整舊腩肉,密封好袋口,一定要封好,不然醃料的汁液會留出的。
Prepare a vacuum bag or ziplock bag, put the pork belly in and add salt, black pepper, brown sugar, bay leaves, honey or maple syrup (bacon only) and jupiter berries (personal preference), mix all the seasonings well and cover the whole pork belly, vacuum it or zip it well (make sure no water can be escaped)
5. 然後放入雪櫃7天,但每天也是翻一次,最好按摩一下腩肉。
Put it into Refrigerator for 7 days and flip it over every day, better massage it too.
6. 醃肉7天後在雪櫃取出後,先在水喉下沖先及用手把醃料沖走,然後準備一個大碗,加入水及冰,把沖洗好的腩肉放入並浸水3小時。
Take it out after 7 days curing, wash it and get rid out all the seasonings under tape water, then prepare a large bowl, add water and ice and put the pork belly in for 3 hours
7. 浸好後可以取出並印乾水份,最後可以進行煙燻了。 熱燻100°C,1小時,請不要離開,要一直保持這個溫度才可。
After 3 hours, take out and dry it using paper towel or cloth, and you can start smoking at 100°C for 1 hour, please keep in eye and maintain in constant temperature.
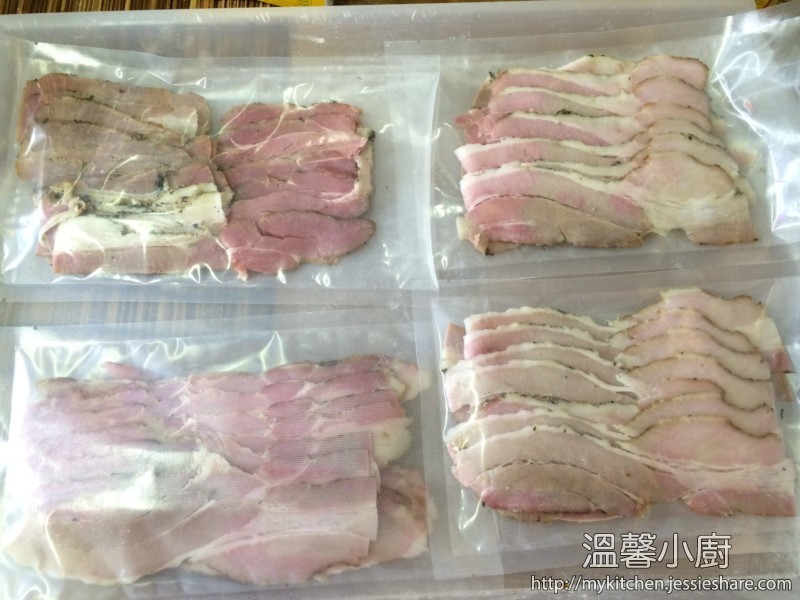
8. 煙燻好放涼後就可以切片存放
After Smoking, just cool down and you can cut into slice and keep it in refrigerator.
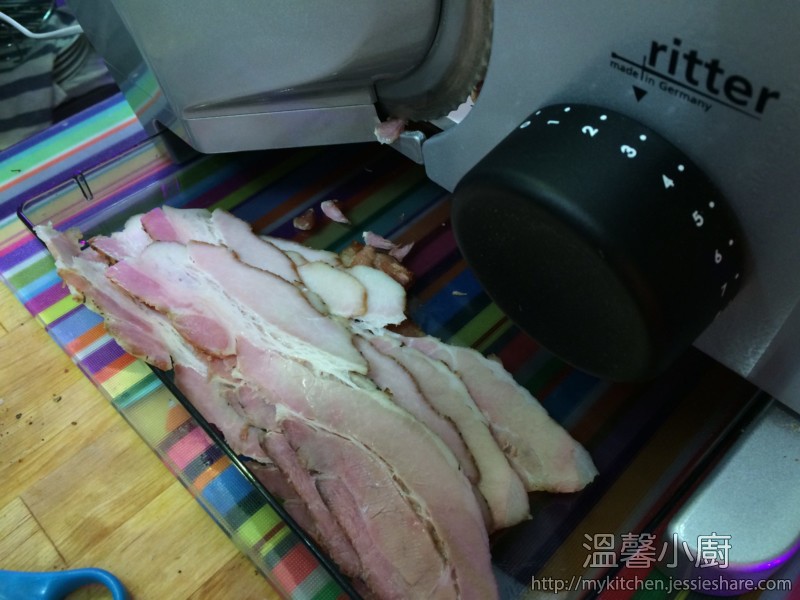
由於醃好的肉比較硬身,小編建議使用切肉機幫助,切成薄片。 小編找了很久才找到這個非一般輕巧的小型切肉機,除了切肉外,也可切硬的鄉村包,真的很方便,當您時常也做自己不同的醃肉時,這真是個好幫手,這部切肉機比中國製造的還要便宜很多了 :
Since after cured, bacon is quite hard, better use meat slicer to assist for cutting into thin slices. Since most of the meat slicer is bulky and require much space, finally, I found one that very compact and light, and the most important is cheaper alot than made in China one, you can also use it to slice for sourdough as well :
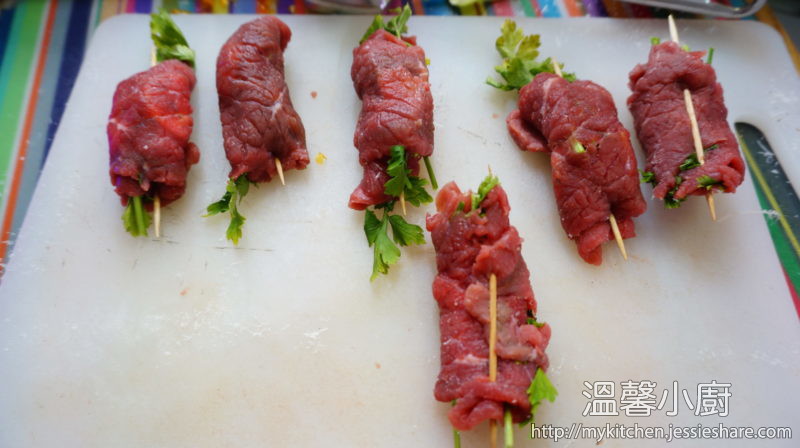
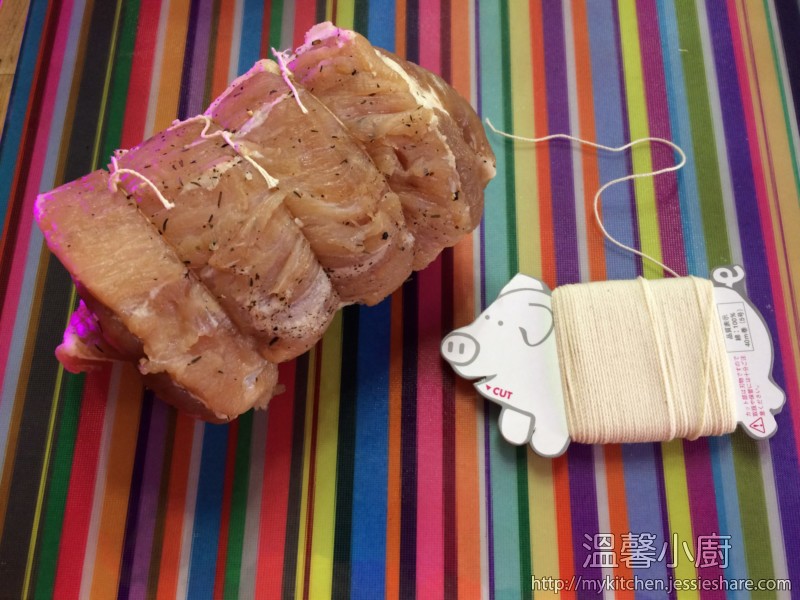
2. 準備好紮肉的綿線,把腩肉卷好,依以下方法紮好
prepare a butcher string, roll it well and follow the below step to tie the knot well
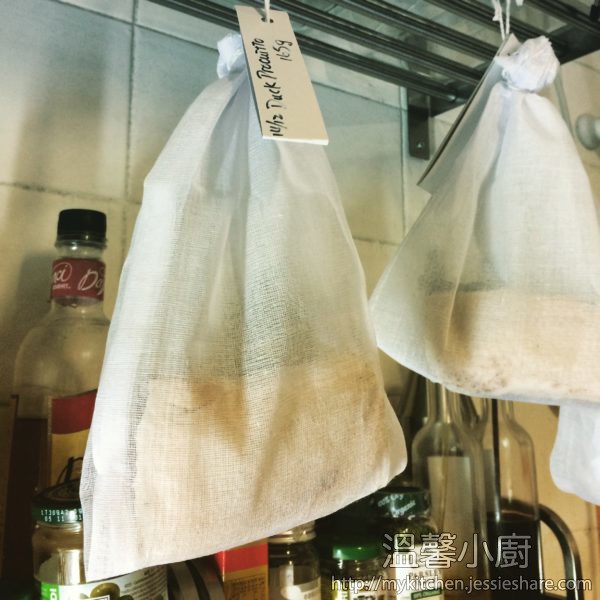
3. 準備好綿袋或魚湯袋(小編用2個袋以防止蚊蟲在肉上產卵),把袋掛在沒有陽光及比較潮濕的地方,例如 : 星盆附近,等待風乾一個月,切成粒就可以用來煮食了。 最重要是注意風乾的時間,如果在香港,最好在深秋至初冬時候進行,因為溫度必須保持在10-18°C及濕度在60-80%進行,否則必須買來特製專用來做風乾熟成的雪櫃來控制其溫度及濕度,或者買來一般的酒櫃加以改裝可控制濕度來進行,不然就不可進行風乾,特別是在炎熱的天氣,這樣會容易滋生奪命細菌,請大家不要掉以輕心,食物安全是很重要的。
Prepare a cotton bag or soup bag (I’m using double soup bag to prevent any eggs from bugs and mosquitos), hang the bag in a place that moisture but out of sunlight. After a month, you can take it out, cut it in chunk and cook it. But it is very important about to proceed this in a right temperature and humidity, in Hong Kong, you can do it during late Autumn and early Winter, keep the temperature around 10-18℃ and humidity around 60-80%, if you can’t kepp it, I would strongly advice you to buy a dry aged chiller to control temperature and humidity or buy a wine chiller which modify it to control humidity to proceed the air dry process, otherwise, I don’t suggest you to make it, especially on hot weather, it is really easy to grow harmful bacterias that really kill youself, so please please take it seriously, food safety is really important.
This is an extra post that I’m not support to write it now, recently I tried to make homemade potato chips that really like factory one, and uploaded in facebook group, however, so many feedbacks hope that to write a recipe for this, thus, just put aside the post of bacon making, and today, just organised photos and share it out.
Actually, it’s so many steps for doing it, but it is healthy and worth to doing so. Not like the package one, factory must added large amount of salt, flavourings, colourings, preservations etc, and the main point is they are using recycle oil, it is really harmful for our health.
First, we have to buy white potato, it’s more hard and not easy to turn black, don’t buy the package one from supermarket, that is russet potato, which is good for cooking and making salad, but not good for frying.
做法 :
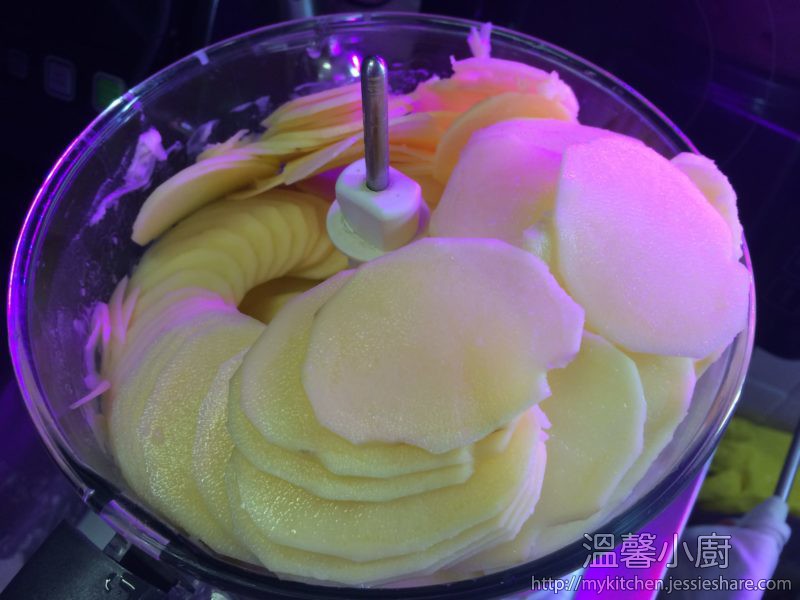
1. 首先,把薯仔去皮,清洗乾淨,用食物處理器把薯仔切成2分厚
First, peel the skin, wash it well and use food processor for cut it in slices for 2mm thickness
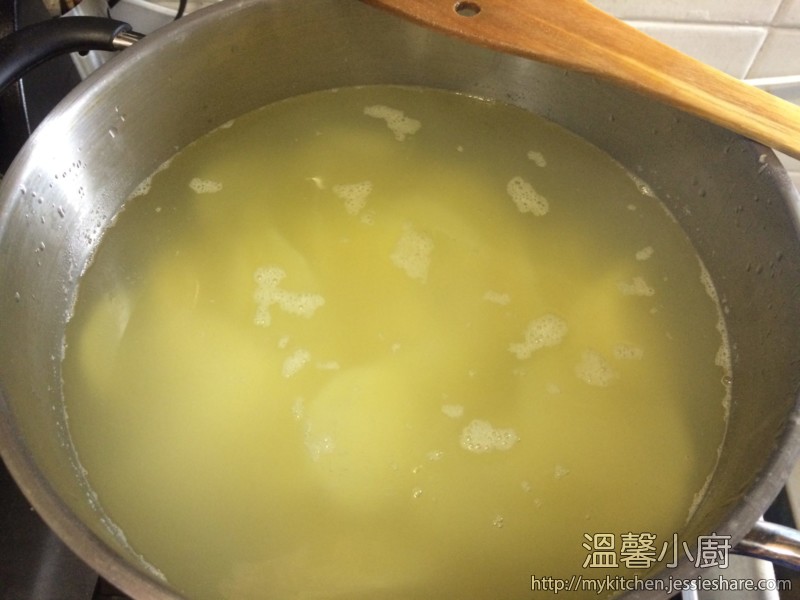
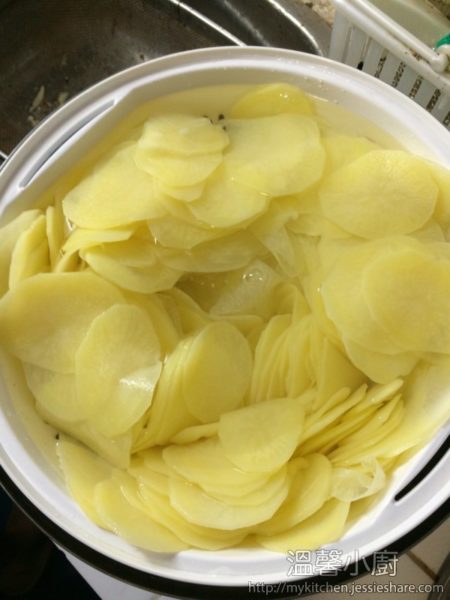
2. 準備一個鍋,加入清水煲滾,當水滾後加入白醋,水與白醋的比例是2:1,然後把新鮮薯片放入,煲15分鐘。這個步驟用來去除薯仔內的澱粉質
Prepare a pot, boil water, add white vinegar when water boiled, water and white vinegar the ratio is 2:1, then put the potato slices and boil it for 15 minutes, this steps is used to wash out the potato starch
3. 準備一個篩及大碗,把篩放在大碗內,煲好後把薯片倒在篩內,先在水喉下沖洗一會,待薯片涼一點後,用清水浸著薯片並手清洗多餘的澱粉質,這個步驟需要反覆清洗及更換清水,直至看到水能清晰見底就可以了。
Then, prepare a sieve with a large bowl, put the sieve into the bowl, when the potato boiled, then use tape water to cool down a bit, then use your hand to wash out the remaining starch, repeat wash and replace water steps until water is clear.
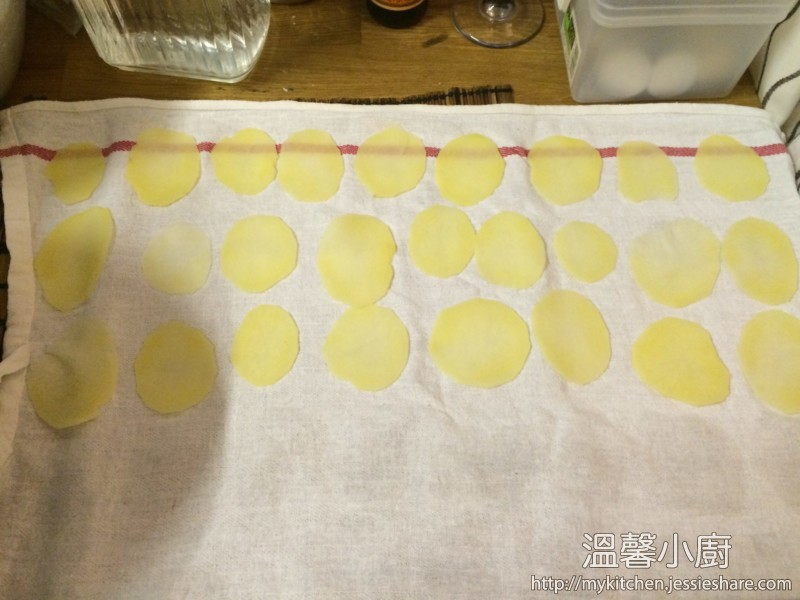
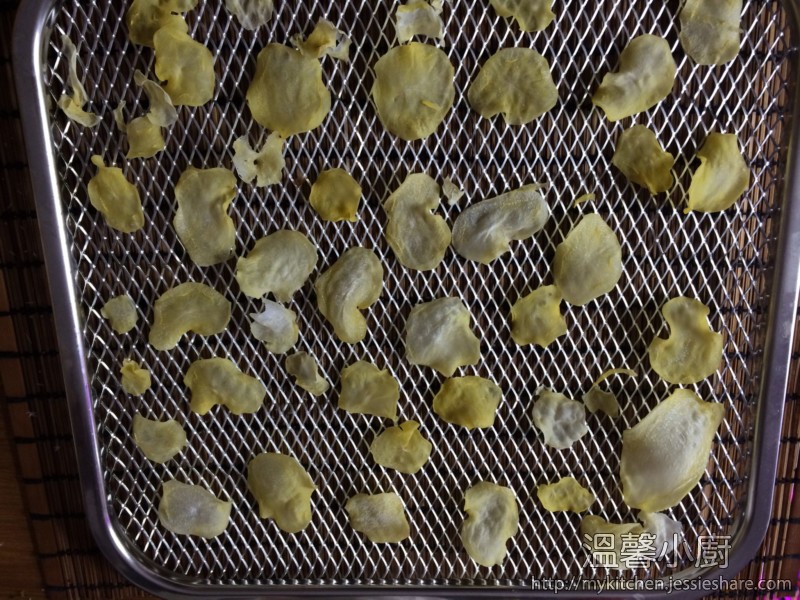
4. 跟著用紙或布印乾水份,放上風乾機,風乾至硬身。小編的風乾機用了日照晒乾模式,70度,3小時就完成了。但讀者沒有用這個風乾機,請參考您所用的風乾機手冊。
After washed, use paper or towel to dry out some water, then use dehydrator to dehydrate it until becomes hard. Since my dehydrator is the newest model, I can select sun-dried mode for 70 degrees for 3 hours only. So please follow your dehydrator manual if you are not using this model.
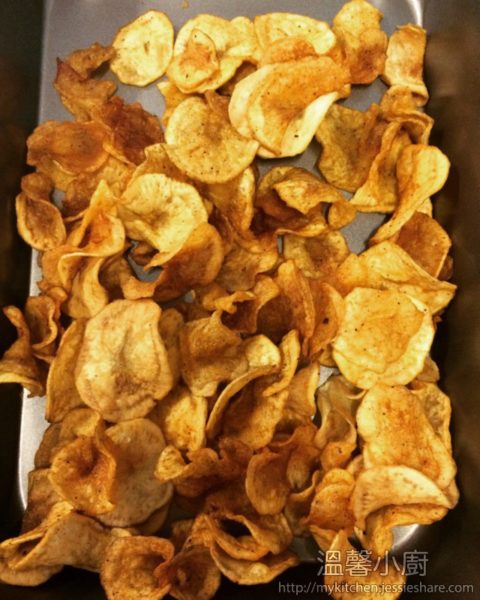
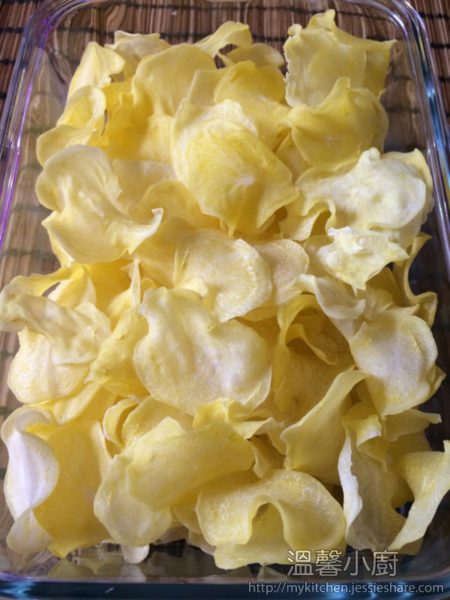
5. 風乾後可以存放很久,要吃的時候先放入熱水浸15分鐘或煲至軟身,印乾,加入油及你喜歡的調味撈勻,放入氣炸鍋,160度,10分鐘,然後再180度,3分鐘就可以享用了。
After dehydrated, you can keep in a jar for long time, when you wanna eat, just put the potato slice into a hot water for 15 minutes or boil it for a while, then mix some oil and your favourite seasonings, put into airfryer for 160degrees, 10 minutes, enjoy!